
So, I’ve been looking for a desk to makeover for awhile. This desk will go in the spare bedroom/office. Basically, I just need a place to store important papers that apparently come with becoming an adult. I found this lovely tanker desk (Pinterest taught me that’s what it’s called) on Craigslist for $30. I loved it for two reasons: 1) This is the desk that everyone of your elementary school teachers had. It takes me back. 2) I think taking metal things and making them look “homey” is really cool.
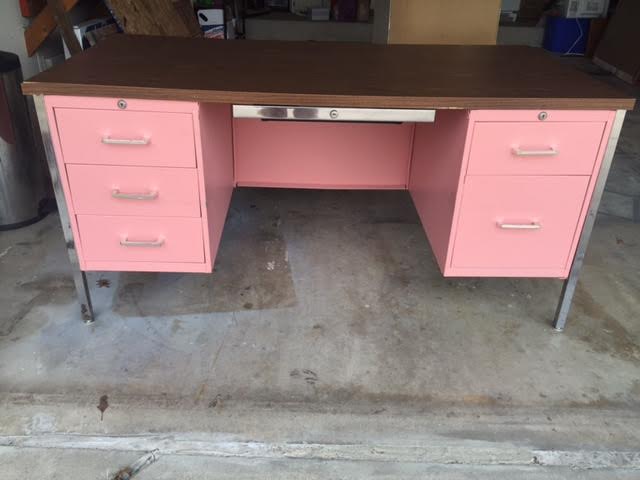
As you can see, someone already gave this desk a makeover of their own. However, I’m not really a “pink” kind of girl and it needed to go.
Let’s get started! You’ll need:
- Can of spray paint, color of your choice. I chose Valspar Metallic Gold ($7)
- Wood filler or melamine edging (I’ll explain later) ($0- I already had this)
- Paint color of your choice. I used Valspar Furniture Paint in white ($20- I have extra and will use it again)


Step 1: I started off by painting the detail of the desk that I wanted to be spray painted in the metallic gold. For the top drawer, I had to get creative and cover the inside of the drawer of paper so I didn’t get it inside of the drawer. Keep in mind, though, that you’ll be painting everything else in so if you get a little messy with the gold, you can cover it up later.


Step 2: The edge of the veneer was peeling off this desk so I helped it a little and took it all off. It peeled right off. I thought I could buy melamine edging, which just irons on to create a nice edge but, my local Home Depot didn’t carry the width I needed. This probably would have been a better option but, I’m impatient and don’t like stores so, I improvised.
Since the top of the desk is made of particle board, the edge is not nice and smooth. It’s pretty porous and if you paint right of top of it, it might look silly. To fix this, I used my finger to spread a thin layer of wood filler around the edge. This is paintable and filled all the holes. Viola-problem solved! After it dried, I sanded it down and had a nice edge that was ready to paint.
Step 3: Since this was already painted with chalk paint, I went ahead and painted right over it. However, make sure you give the top a good sanding. Looking back, I probably should have primed it. It took me four coats to get full coverage and eliminate that baby nursery pink.
I have not used Valspar Furniture Paint before but, it was quite a bit cheaper than chalk paint so I thought I’d give it a shot. Although I had to do several coats, I would probably use this again. To be fair, I was painting on metal covered with chalk paint which probably isn’t the easiest medium to tackle. I think I’m going to give it another shot on some wood furniture soon. I got this at my local Lowes and there are a lot of color options to choose from that can be mixed for you.
*Note: I thought about just replacing the whole top. I thought a nice stained wood top would look really cool. In the end, I decided to keep my costs down and keep the existing top.

Step 4: Paint the hardware. I planned on getting new hardware but, there drawer pulls were much longer than your standard pulls. Therefore, the choices in that size were quite dismal so I decided to stick with what I had and give them a face-lift.

Step 5: Get on the phone and call some friends. Friends that are strong. This desk is HEAVY! Pro-tip: don’t put the drawers back in until after you move it. Also, I had to take the legs off to fit it through the door. Since I don’t believe in measuring if things fit through doors, it was a nice surprise when we had already carried up the stairs. Maybe I should start believing in it? All in all, it was a pretty easy project and just required a quick “spruce.” It looks great in the bedroom/office!


Hey! I’m your biggest fan and love keeping up with all your posts! Will you please make a post explaining the steps to take if you were to transform an end table into a cozy doggy getaway? Thanks so much!! It would make my night if you replied!!!
LikeLike
Wow, that looks great!
LikeLike